Looking for some fairly instant gratification (and to satisfy a bee that was buzzing around in my bonnet), I decided to make a "mini" quilt; actually a table-topper. I had an idea in my head, so I figured out the style and finished size I would need and planned it out on graph paper:
First the squares of fabric (100% cotton only, of course!) need to be cut, using a rotary cutter and clear quilting ruler. Each square would have to be exactly 3" x 3" (for a finished block size of 2.5" x 2.5") and I knew that I'd need to cut 162 of the little buggers! (28 "dark" value, 40 "medium", and 94 "light".) So I went to my fabric stash and started rooting around.
Once the fabrics were chosen and all the squares cut, I laid them out on the sewing table, arranging and rearranging until it was *juuuuust right*! The general idea was darker squares through the center of the topper gradually fading out to medium and then light squares; with medium and dark colors at the outer edge as a "frame".
This type of quilt is called "on point", and that means that the squares are positioned on their points, diamond shaped.
Once I had all the blocks arranged (this is where my OCD kicks in big time!) and after my hubby gave it an objective second opinion (all squares pleasingly placed, color "even" throughout, no two colors accidentally placed side-by-side... etc!) -- I stacked, pinned and numbered the individual rows in preparation for sewing. That's a bit time-consuming, but I've never been able to figure out an easier (but still idiot-proof!) way to successfully do that!

Now, using only 100% cotton thread, the fun (sewing!) started. Each "packet" of pinned-together squares represents a specific row of the quilt. I keep the rows carefully numbered, so I know the order to sew the rows together, when that time comes. BTW, quilts are always sewn with one-quarter-inch seam allowance, and seams are always pressed to one side, never pressed open.
Now the individual rows are all done (sewn and pressed), and ready to be sewn together.
Now the rows are sewn together. It's not pressed yet, but it's starting to look like a quilt!
After I press the front, I carefully press the back. (Yeah, I'm as OCD about the BACK as I am the front!) But srsly ;o) careful pressing is as important as careful sewing, and if the seams aren't nice and flat and smooth, it WILL be noticeable when the quilt is finished!
Now the top is finished! But the quilt is still far from being done.
Next I cut a piece of fabric for the back, and a piece of batting for the "middle" layer of the quilt, (I prefer "Warm and Natural", a thin 100% cotton batting). Both the batting and the backing need to be cut a little larger than the quilt top. Then I fold all 3 pieces lovingly, kiss them goodbye ;o) and take the whole kit 'n' kaboodle to a professional machine quilter for her to do her magic. Twenty five dollars and a few weeks later, this is what I get back:
Here are some close-ups of the stitching... isn't it beautiful? This is called a "stipple" design, and it is my all-time favorite. Nice and tight, with lots of thread. *YUM!*
The quilt now needs "squared up" and the excess fabric and batting (carefully!) trimmed away. A 15" clear, square Omni-Grid quilter's ruler works great for getting this right.
All 4 sides trimmed; quilt nice and "square":
The quilt is almost done. It just needs the binding made and sewn along the edge to finish.
I chose the fabric for the binding and then figured out how much I needed to make: (Basically, the outer perimeter of the quilt plus 10" added for the mitered corners, which in this case equals 138") See how high-tech my cipherin' is?!

For 1/2" finished binding, four strips of (40" wide) fabric are cut 3" wide, then sewn together into one long piece of fabric. This is then folded in half lengthwise, pressed, and sewn with a 1/2" seam allowance to the front edge of the quilt (by machine), folded over and sewn to the back by hand.
The binding is now all sewn on.
Once the binding is pressed and folded to the back, and the corners neatly mitered, it's hand-sewn all around. A thimble and a good movie (and a kitty or two nearby!) makes this part pretty fast and enjoyable!
Here's what the finished back looks like:
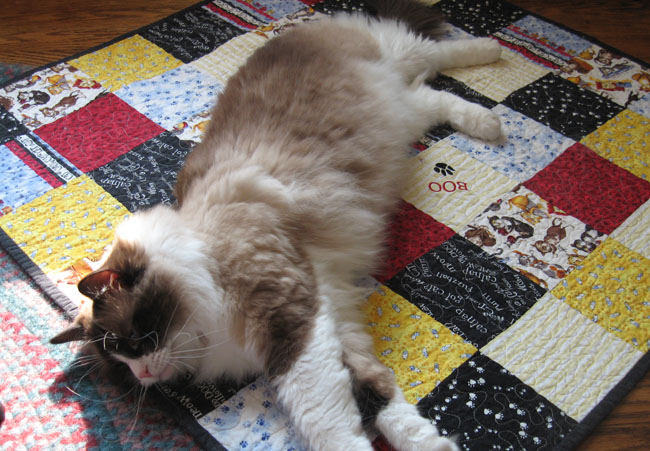
*TA DA!* Mission Accomplished! Project Mini-Quilt complete and placed on the table! I love it!
Really, how CUTE is that?! And it was pretty darn quick 'n' easy, too -- especially with the help and company of my two quilt-lovin' trusty side-kicks!
* For more quilt posts, please look
here,
here, and
here! Thank you!


 Welcome Home, Bentley!