LIFE WITH LYNN


Sharing and enjoying my small-town life with my darling husband, family, friends,
faith, two adorable Ragdoll cats and one very sassy Yorkie!


Saturday, April 23, 2011

Table-Topper Quilt; Step-by-Step


Looking for some fairly instant gratification (and to satisfy a bee that was buzzing around in my bonnet), I decided to make a "mini" quilt; actually a table-topper.  I had an idea in my head, so I figured out the style and finished size I would need and planned it out on graph paper:


First the squares of  fabric (100% cotton only, of course!) need to be cut, using a rotary cutter and clear quilting ruler.   Each square would have to be exactly 3" x 3" (for a finished block size of 2.5" x 2.5") and I knew that I'd need to cut 162 of the little buggers!  (28 "dark" value, 40 "medium", and 94 "light".)  So I went to my fabric stash and started rooting around.

Once  the fabrics were chosen and all the squares cut, I laid them out on the sewing table, arranging and rearranging until it was *juuuuust right*!  The general idea was darker squares through the center of the topper gradually fading out to medium and then light squares; with medium and dark colors at the outer edge as a "frame".

This type of quilt is called "on point", and that means that the squares are positioned on their points, diamond shaped.

Once I had all the blocks arranged (this is where my OCD kicks in big time!) and after my hubby gave it an objective second opinion (all squares pleasingly placed, color "even" throughout, no two colors accidentally placed side-by-side... etc!) -- I stacked, pinned and numbered the individual rows in preparation for sewing.  That's a bit time-consuming, but I've never been able to figure out an easier (but still idiot-proof!) way to successfully do that!


Now, using only 100% cotton thread, the fun (sewing!) started.  Each "packet" of pinned-together squares represents a specific row of the quilt.   I keep the rows carefully numbered, so I know the order to sew the rows together, when that time comes.  BTW, quilts are always sewn with one-quarter-inch seam allowance, and seams are always pressed to one side, never pressed open.


Now the individual rows are all done (sewn and pressed), and ready to be sewn together.  


Now the rows are sewn together.  It's not pressed yet, but it's starting to look like a quilt!


After I press the front, I carefully press the back.  (Yeah, I'm as OCD about the BACK as I am the front!)  But srsly  ;o)  careful pressing is as important as careful sewing, and if the seams aren't nice and flat and smooth, it WILL be noticeable when the quilt is finished!


Now the top is finished!  But the quilt is still far from being done.


Next I cut a piece of fabric for the back, and a piece of batting for the "middle" layer of the quilt, (I prefer "Warm and Natural", a thin 100% cotton batting).  Both the batting and the backing need to be cut a little larger than the quilt top.  Then I fold all 3 pieces lovingly, kiss them goodbye ;o)  and take the whole kit 'n' kaboodle to a professional machine quilter for her to do her magic.  Twenty five dollars and a few weeks later, this is what I get back:


Here are some close-ups of the stitching... isn't it beautiful?  This is called a "stipple" design, and it is my all-time favorite.  Nice and tight, with lots of thread.  *YUM!*


The quilt now needs "squared up" and the excess fabric and batting (carefully!) trimmed away.  A 15" clear, square Omni-Grid quilter's ruler works great for getting this right.


All 4 sides trimmed; quilt nice and "square":


The quilt is almost done.  It just needs the binding made and sewn along the edge to finish.

I chose the fabric for the binding and then figured out how much I needed to make:  (Basically, the outer perimeter of the quilt plus 10" added for the mitered corners, which in this case equals 138")   See how high-tech my cipherin' is?!


For 1/2"  finished binding, four strips of (40" wide) fabric are cut 3" wide, then sewn together into one long piece of fabric.  This is then folded in half lengthwise, pressed, and sewn with a 1/2" seam allowance to the front edge of the quilt (by machine), folded over and sewn to the back by hand.


The binding is now all sewn on.


Once the binding is pressed and folded to the back, and the corners neatly mitered, it's hand-sewn all around. A thimble and a good movie (and a kitty or two nearby!) makes this part pretty fast and enjoyable!

Here's what the finished back looks like:


*TA DA!*  Mission Accomplished!    Project Mini-Quilt complete and placed on the table!   I love it!


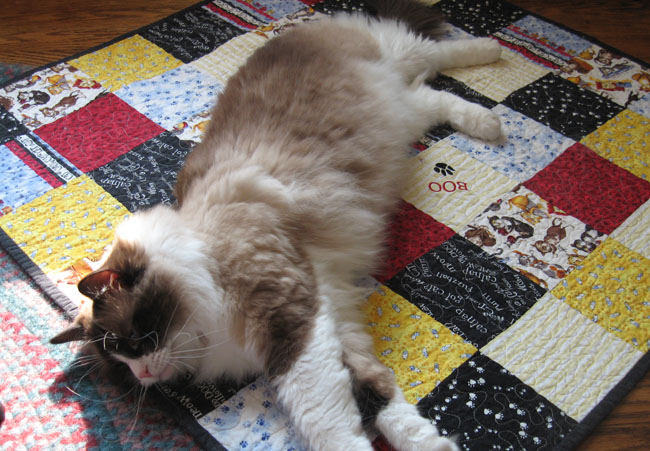
Really, how CUTE is that?!  And it was pretty darn quick 'n' easy, too -- especially with the help and company of my two quilt-lovin' trusty side-kicks!



*  For more quilt posts, please look here, here, and here!    Thank you!

Friday, April 1, 2011

Holy Vastness, Batman! TRAVEL: the Grand Canyon!


Well, it has been on my Bucket List  ;o) for awhile now... the Grand Canyon.  We flew over it once on a flight to the west coast... but that only served to whet our appetites to see it "up close and personal".  A recent vacation "out west" gave us that opportunity.

Traveling with our daughter and son-in-law (hereinafter lovingly referred to as "the kids"!), we just got home from 2+ weeks in Nevada and Arizona.  We went last year and had such a good time (links: HERE and HERE), we decided to get outta the PA cold and "do it again" this year!  The kids had never been to Vegas, and Barry was VERY eager to see another Cirque Du Soleil show... so Vegas (for a few days) was our first stop.

We had a great time; we loved the show (Cirque's "O" at the Bellagio).   My boy sat as still as a stone, eyes wide, mesmerized by the show!


We stayed at New York, New York, which was very nice, and quite affordable.

Although, Travel Tip #1: there was a $15/night mandatory "resort fee", which was never mentioned or charged until check-in. Not all Vegas hotel add that charge (although many do) - so check first; it can make a difference when you are shopping for the best deal.

AND... no matter what the reservation clerk tells you, the shuttle to and from the airport is NOT free!
New York New York, Las Vegas


So, what do non-gamers do in Vegas?  We shop and dine and enjoy all the sights, sounds, and attractions of the city that never sleeps.

We rented a car, and after Vegas, we drove to the Flagstaff area to visit one of our daughter's oldest and dearest friends.  They hadn't seen each other in several years, and it was a sweet and heartwarming reunion.


From there, we drove to Williams, AZ, and after spending the night, we took the very scenic Grand Canyon Railway to the canyon.


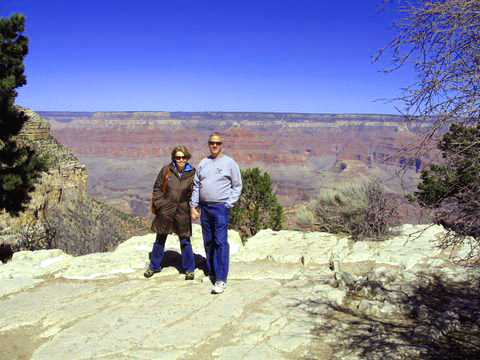
OK, color me speechless! I knew it would be beautiful... and vast... and amazing... but really??! I just didn't realize HOW beautiful... HOW vast... and HOW amazing! Photos simply cannot capture the panoramic vista that our eyes saw... but I tried!!!


My husband read somewhere that the most common injury at the canyon is squirrel bites.  Really!
*ouch!*  Cute little buggers can actually be rather unfriendly, I guess!!!   


After our day at the Grand Canyon, we drove to the Phoenix area for the rest of our vacation.   My sister has a lovely home there, complete with a gorgeous in-ground pool. We shopped, and ate (are you noticing a vacation pattern here?!) visited, made some new friends, bobbed around in the pool A LOT, and otherwise just relished in the warm and sunshiny R and R.

A cute kitty-lovin' sign I saw at a flea market.  NOOOOO, I didn't BUY it, I just took a picture of it!!! 


A display from the (very interesting) Wickenburg Museum:


As before, I LOVED the Arizona landscape...


...and those crazy-gorgeous sunsets!


One night we went to Western Trails, a small community rodeo.  It was lots of fun.  (My sister is getting quite *south-westernized* living part of the year in Arizona.  She is even wearing cowboy boots now!)

Anwyay, it just kills me how some of those bull riders get thrown off those bulls, land HARD, come up obviously in pain, groaning, limping and... smiling from ear-to-ear! 


We were on vacation a little over 2 weeks, and we were quite successful in getting blissfully refreshed and relaxed.  Finally it was time to go -- which honestly, was OK with us.  We'd had a WONDERFUL time, had enjoyed every day... but "real life" (and our darling kitties, of course!) were waiting for us back home. 

And on that note, before I close this post, may I offer Handy-Dandy Travel Tip #2:

Take your passport, even when you are only planning to travel domestically.


Why, you ask?  Your driver's license will provide the necessary photo ID, true, BUUUUT... if you (like us) ever volunteer for a bump, having your passport can open up additional possibilities for re-routing you home.  We were considering an offered bump, but there were no other (domestic) seats available to Pittsburgh for at least 36 hours.  However, we could have potentially been routed through Toronto and gotten home HOURS earlier, if we'd had our passports.  In the end, they didn't need us for the bump after all... but it was a good lesson learned -- for next time!